Remarkable Tablet Wedge
Overview
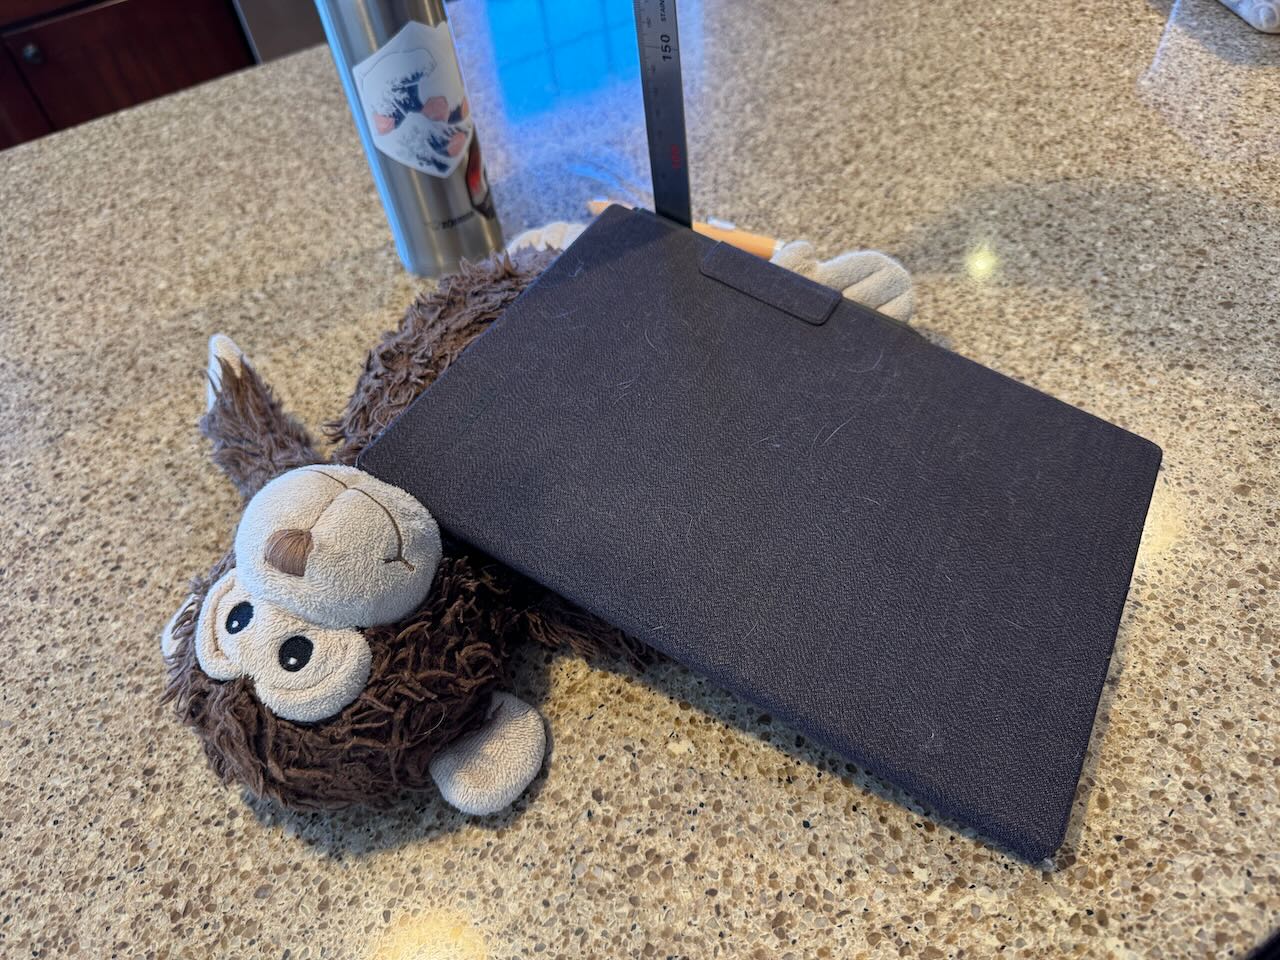
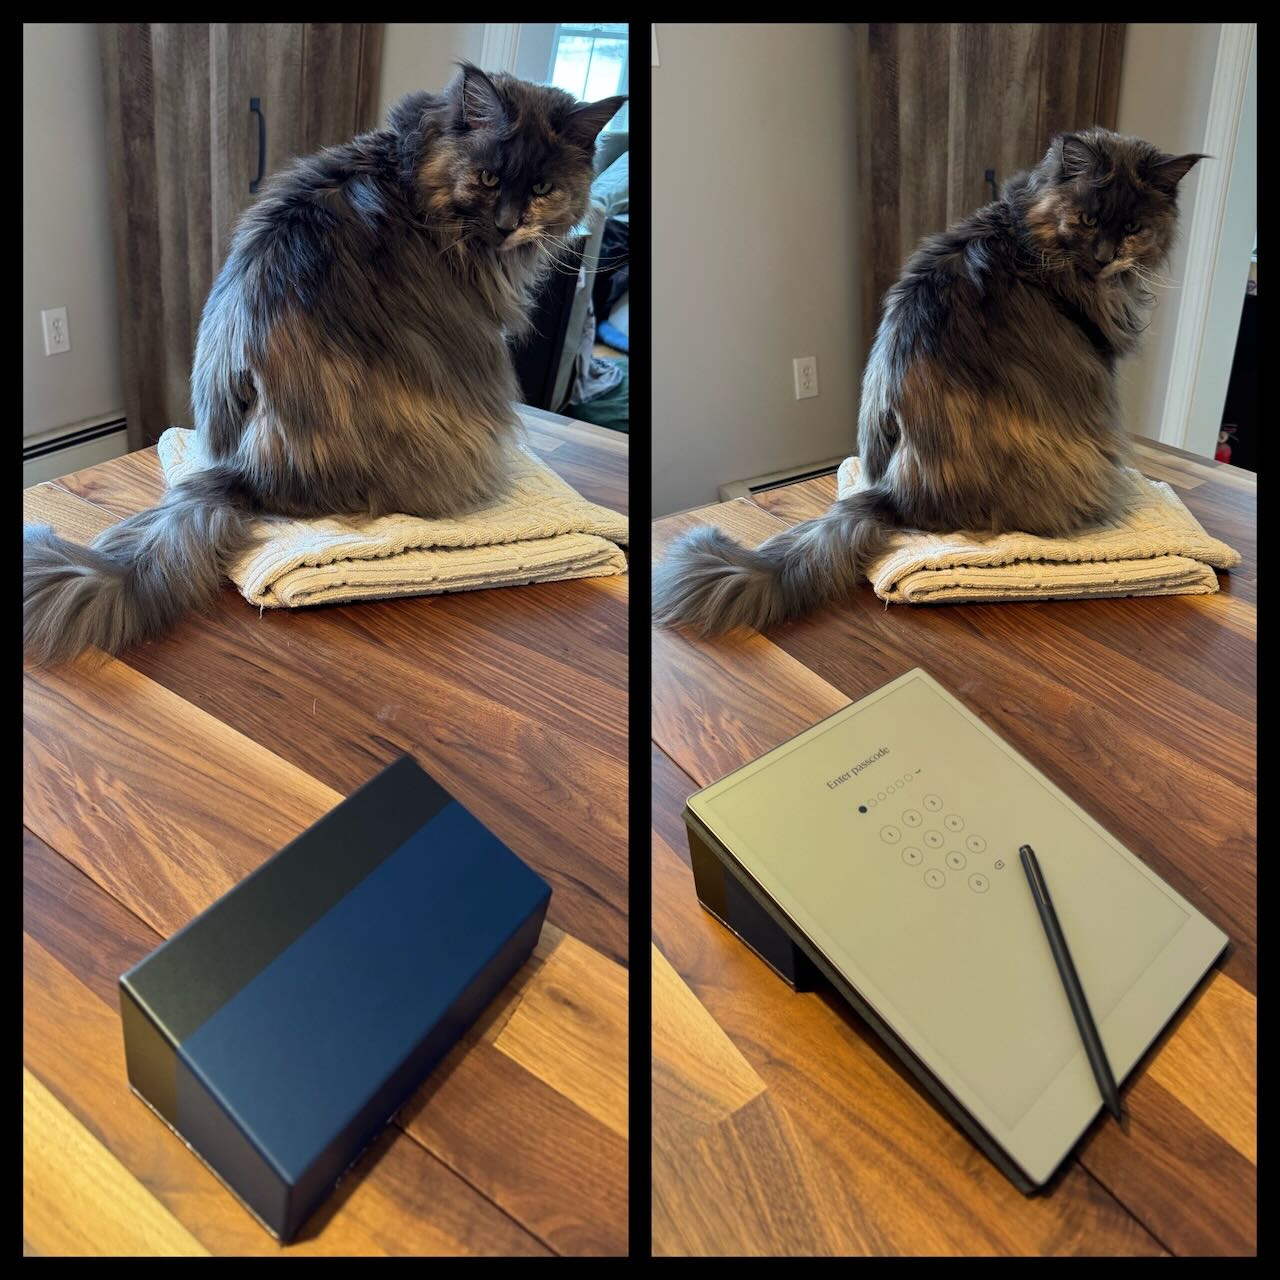
After writing a few hundred pages on my reMarkable Paper Pro I decided to stop using my stuffed monkey, trivets, and other found objects to prop up my tablet when writing. What came out was a simple object, but also one of the most satisfying things I’ve ever made, for physical, and emotional reasons. This post goes over what I did, how I did it, and why it means so much to me. If you just care about the last bit skip to “Satisfaction” at the end. If you are interested in 3D printing, read it all.
Problem Statement
Writing is just easier when the surface you’re writing on is angled towards you. Having something angled at the correct angle for your body is even better.
I want something that…
- feels, and looks solid.
- isn’t as large as the tablet itself
- can be easily carried around the house
First Attempt
I took some measurements, did some math, and even worked through what a collapsible stand might look like.
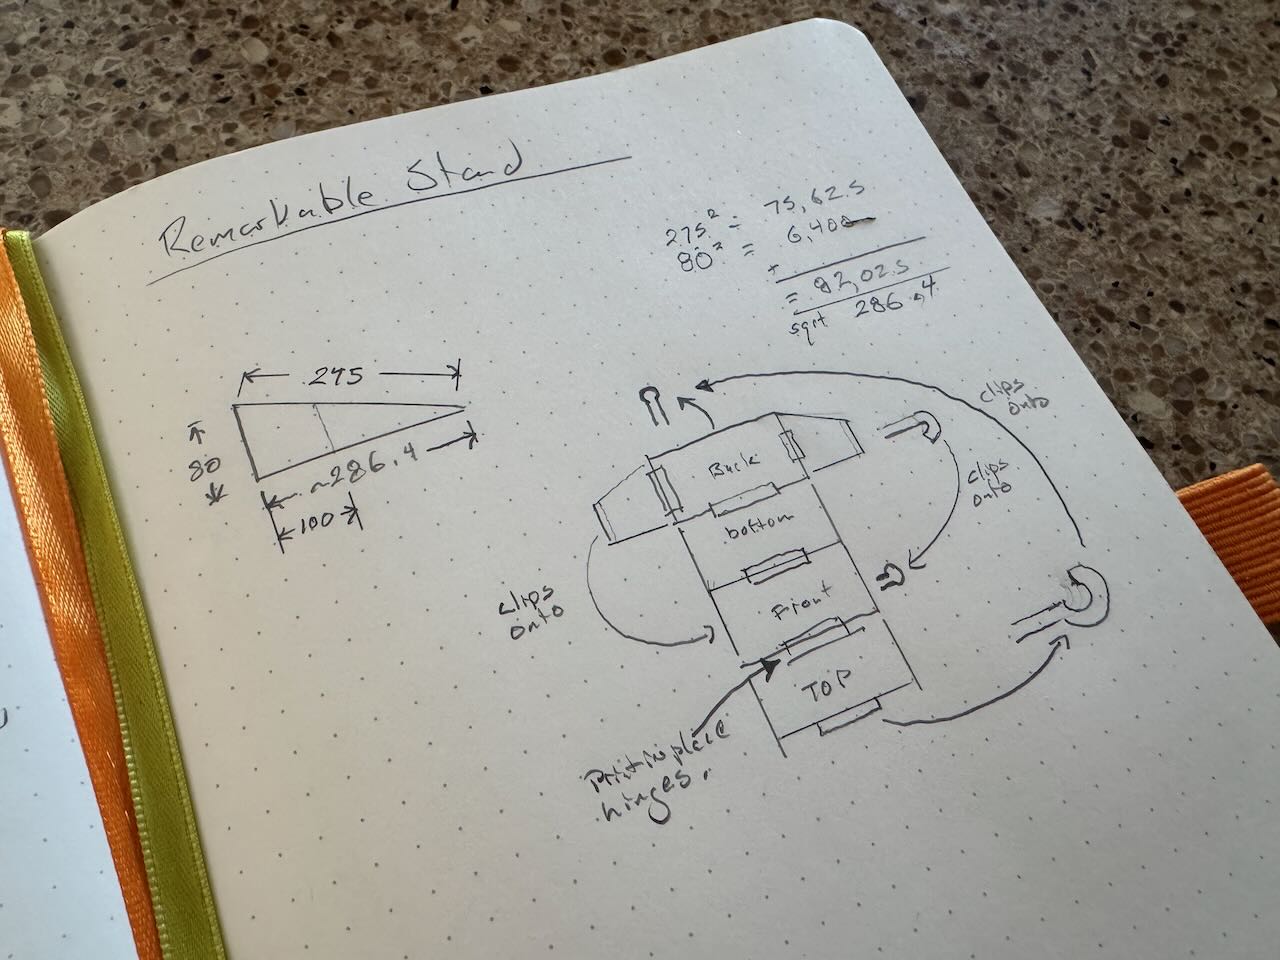
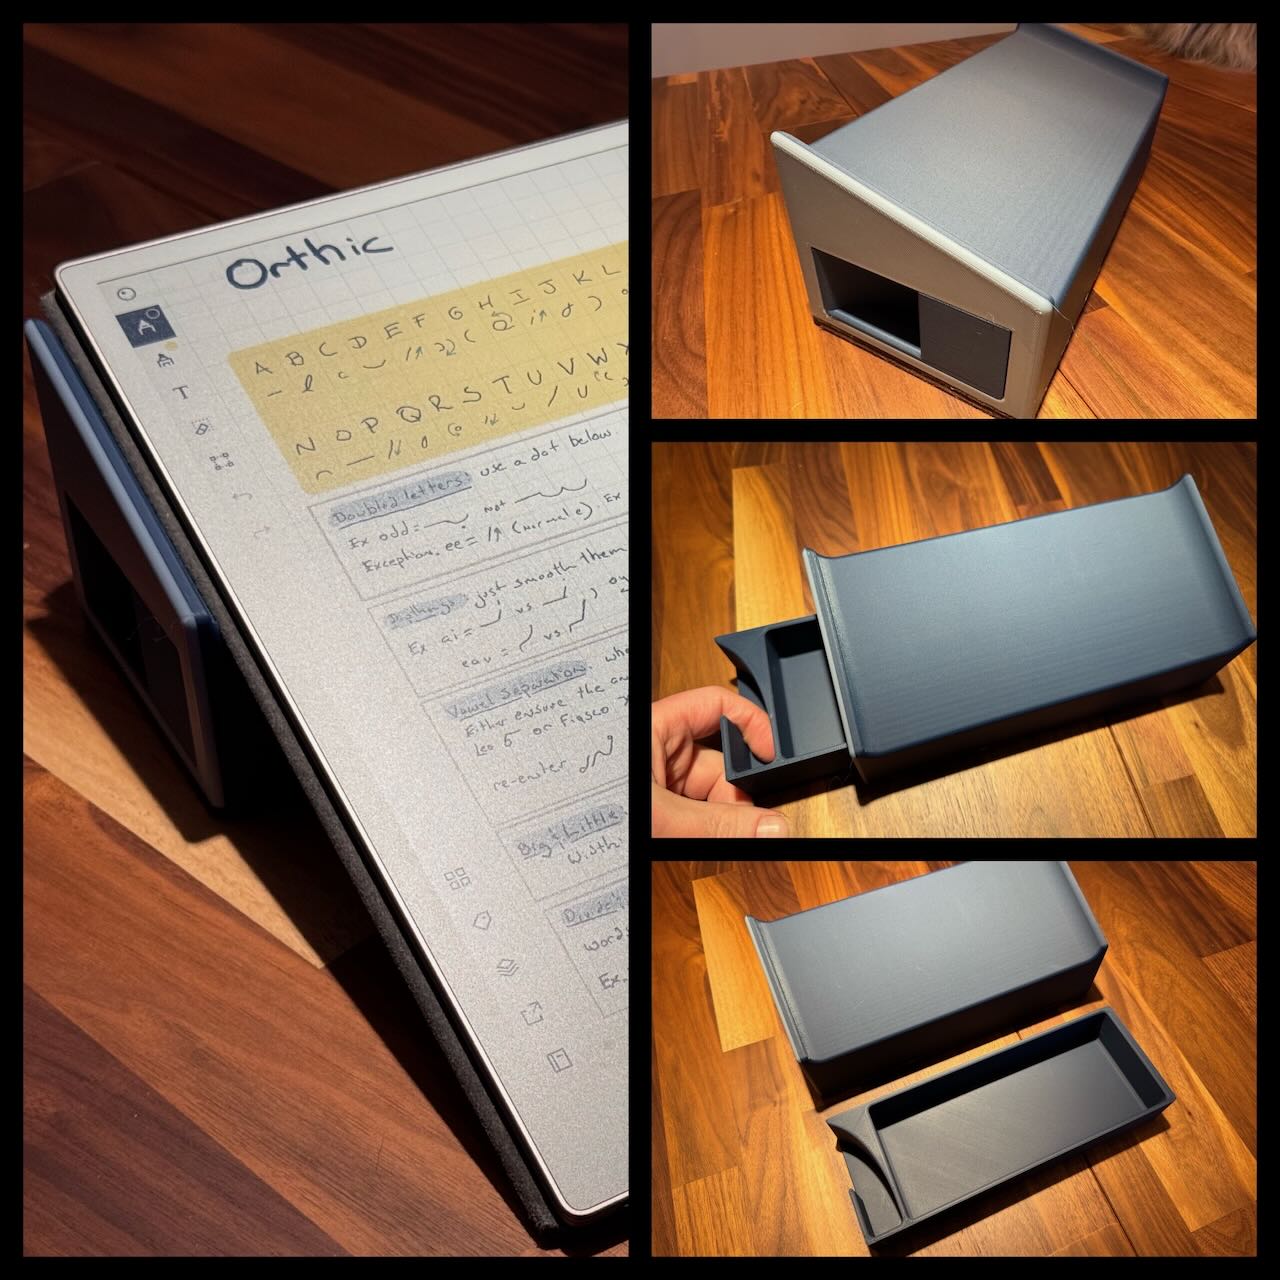
The first version is a simple object. It only took me a few minutes to model it, but there are a couple things I’m proud of. First, I was smart enough to subtract the height of the felt pad on the bottom from the height of the wedge so as not to mess up the angle. The second thing is that my experience with 3D printing kicked in before I sent it to the printer and chose an print orientation that would avoid having any notable steps between layer lines.
It worked well enough, but there were two problems:
First: It turns out I regularly rotate my tablet as I’m writing for wrist and hand comfort. I had no idea. There’s nothing forcing the wedge to shift with the tablet. The cover is fricative, and adding a felt pad to the top would introduce enough friction to solve this problem, but it irks me on an emotional, almost physical level. It would be ugly, and I don’t like the idea of grabbing some wedge that’s felt on both sides.
Second: I find myself seriously annoyed by the wasted space of its interior. I wanted a drawer. I don’t have anything to put in that drawer, but I want it.
The color change was a happy coincidence. I ran out of the sparkly grey “metal” filament and swapped to a matte Marine Blue filament. And the contrast of shiny sparkly and matte in those two colors is amazing in real life. Alas, recreating it in v1.1 would require a lot of wasted filament because of how it has to be printed.
Second Attempt
Solving For Rotation
My unwillingness to rely on friction to solve the rotation problem meant I needed “ears” or “lips” maybe? I’m not sure what to call them. Little edges that stick up. I was considering only putting one on the left, but wise Wifey talked me out of it. The problem with having ears on both sides, is that they need to be close enough to the sides of the tablet so that they start rotating the wedge quickly, but also far enough away on the right that you can easily attach the pen to the side for storage and charging.
The ears did introduce a printing complication.
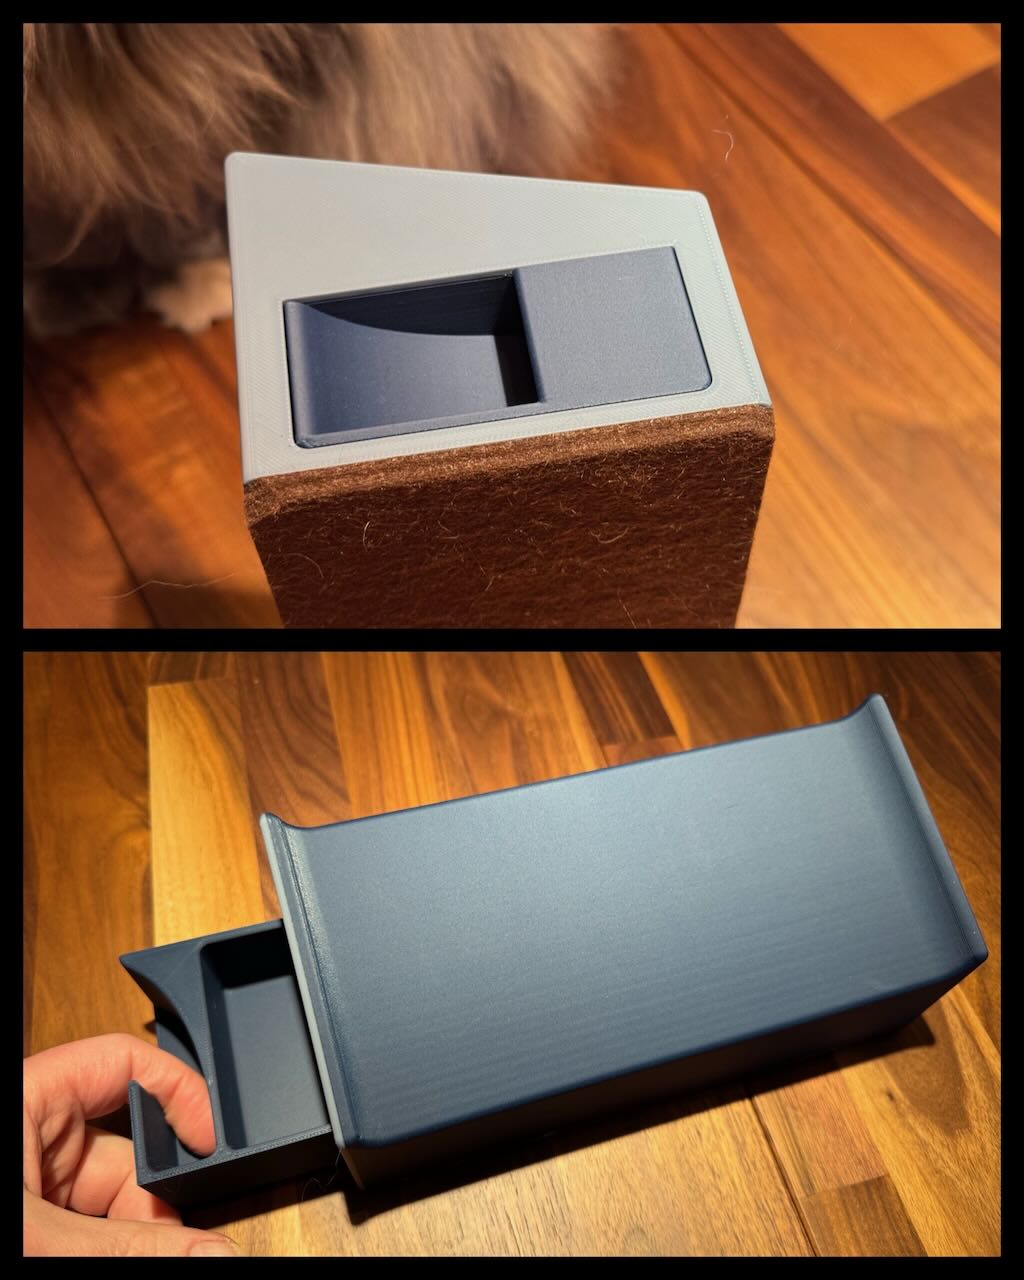
The Drawer
Requirements
- must not slide out freely when carrying it around
- must provide no opening for contents to fall out when carrying around
- must be big enough to support pens, styluses, and other items.
- must be aesthetically pleasing
Staying Shut
Initially I wanted some kind of push-to-open mechanism. I used a bunch of notebook pages working out ways of doing this with an array of magnets arranged in opposing and attracting patterns to create a spring mechanism, then a rack and pinion design. Then I practically face-palmed when I realized I’d just solved this exact problem with simple plastic spring tabs with corresponding holes in my small under-desk drawer design.
I started to iterate on that, but then realized I could do something more elegant with magnets.
Hidden inside the print are two 10mm x 2.75mm disc magnets. They’re hidden not just by virtue of being deep inside the wedge, but also because they have two layers of plastic encasing them. I did this because rare earth magnets are surprisingly fragile, and I was concerned about whacking the magnets in the drawer against these repeatedly. I wanted to cushion the blow, both because it’s impossible to get in there and replace them, and because I didn’t want the “clack” sound of two magnets hitting.
This introduces printing complications.
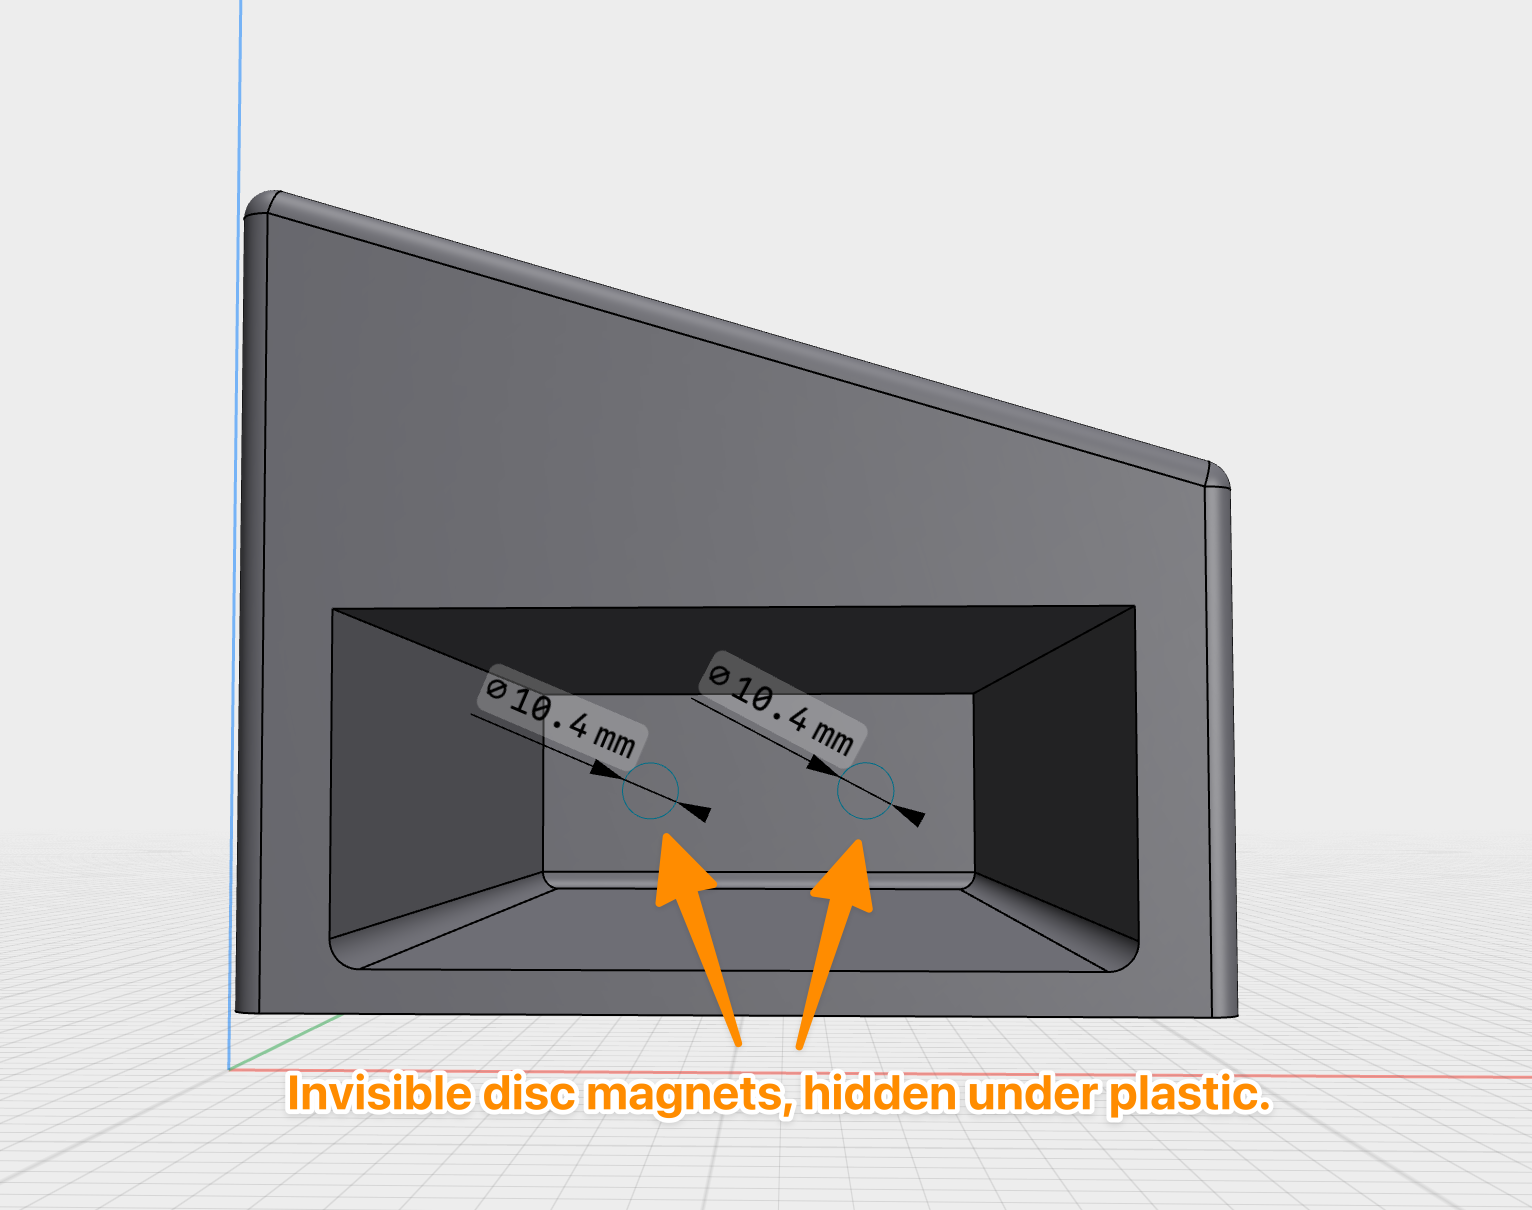
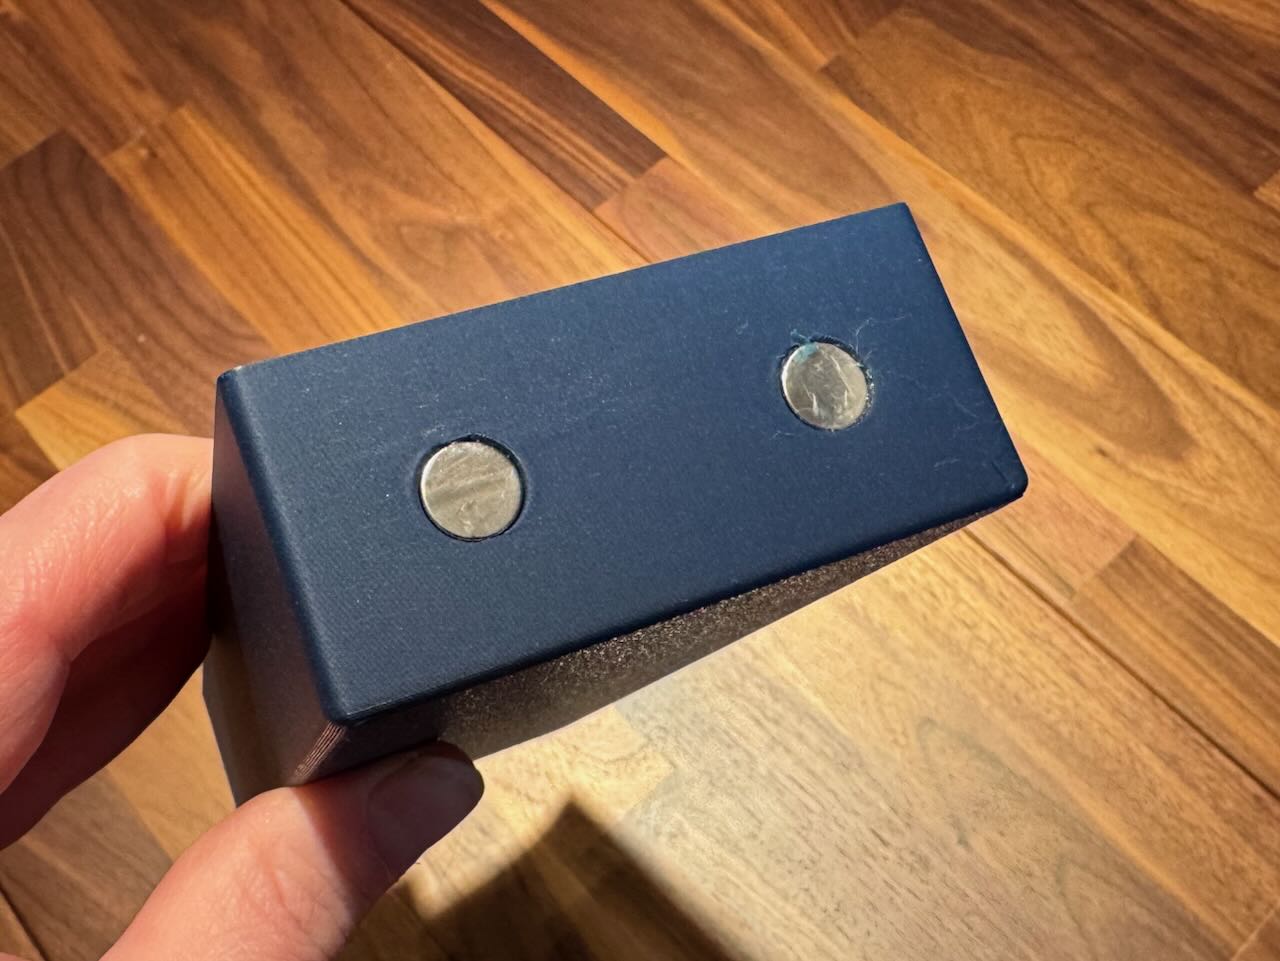
The drawer has another pair of magnets in the corresponding location. I considered encasing these as well, but doing so would have introduced a significant printing hurdle, and I don’t have a problem the aesthetics, especially since you rarely ever see them.
Magnets Magnets Everywhere
I have a variety of small magnets in my toolbox for projects like these. I experimented with thin rectangular ones that were 1mm thick, and a variety of small disc magnets until I found some that were wide enough to address any potential alignment issues between the magnets on the drawer and the ones in the wedge, and had the right amount of pull. 1mm thick just didn’t provide enough force, and they’re trivially easy to snap. 10mm x 4mm proved too much force. I experimented with some 6mm x 3mm but the 10mm x 2.75mm I settled on had a nice balance of surface area and pulling force.
Opening
Having a pull tab that poked out past the side wasn’t an option, nor was having something small and fiddly that you could only get your fingertip into. I wanted something easy to use that felt nice to touch when using. After some sketching, and modeling I ended up with this.
In hindsight, I can see that it’s a swanky version of the pull handle you see on most file cabinets that I’ve rotated 90°. After measuring my finger, I worked to create a curve that would guide my finger gently into the right position to remove the drawer. I intended to cover the top of this, but my gut told me that it would look cool to leave it exposed. I was not disappointed.
Leaving the top exposed also solved a printing problem.
Feel
While I wanted a flush face when closed, I also wanted rounded corners everywhere else. I hate handling unnecessarily sharp edges. So, all the inner and outer edges that wouldn’t effect the flush-fit of the face have been rounded.
This introduced the need for a little bit of math, because rounded edges of the drawer that fit into the rounded edges of the hole have to have a slightly smaller radius, and that needs to account for the way the plastic spreads as it cools. In the end the hole has a 3mm radius fillet (curve) on the bottom edges, and the corresponding edge on the drawer has a 2.2mm radius fillet.
The Printing
I had three problems to deal with.
- both pieces had to be printable without supports. First: because I wanted nice smooth surfaces and supports always leave imperfections. Second: because the places where you wouldn’t see the result of using supports were places that would be incredibly difficult to cleanly remove them.
- Filament expands as it settles and cools, and glue isn’t infinitely thin.
- Some magnets needed to be completely encased in plastic.
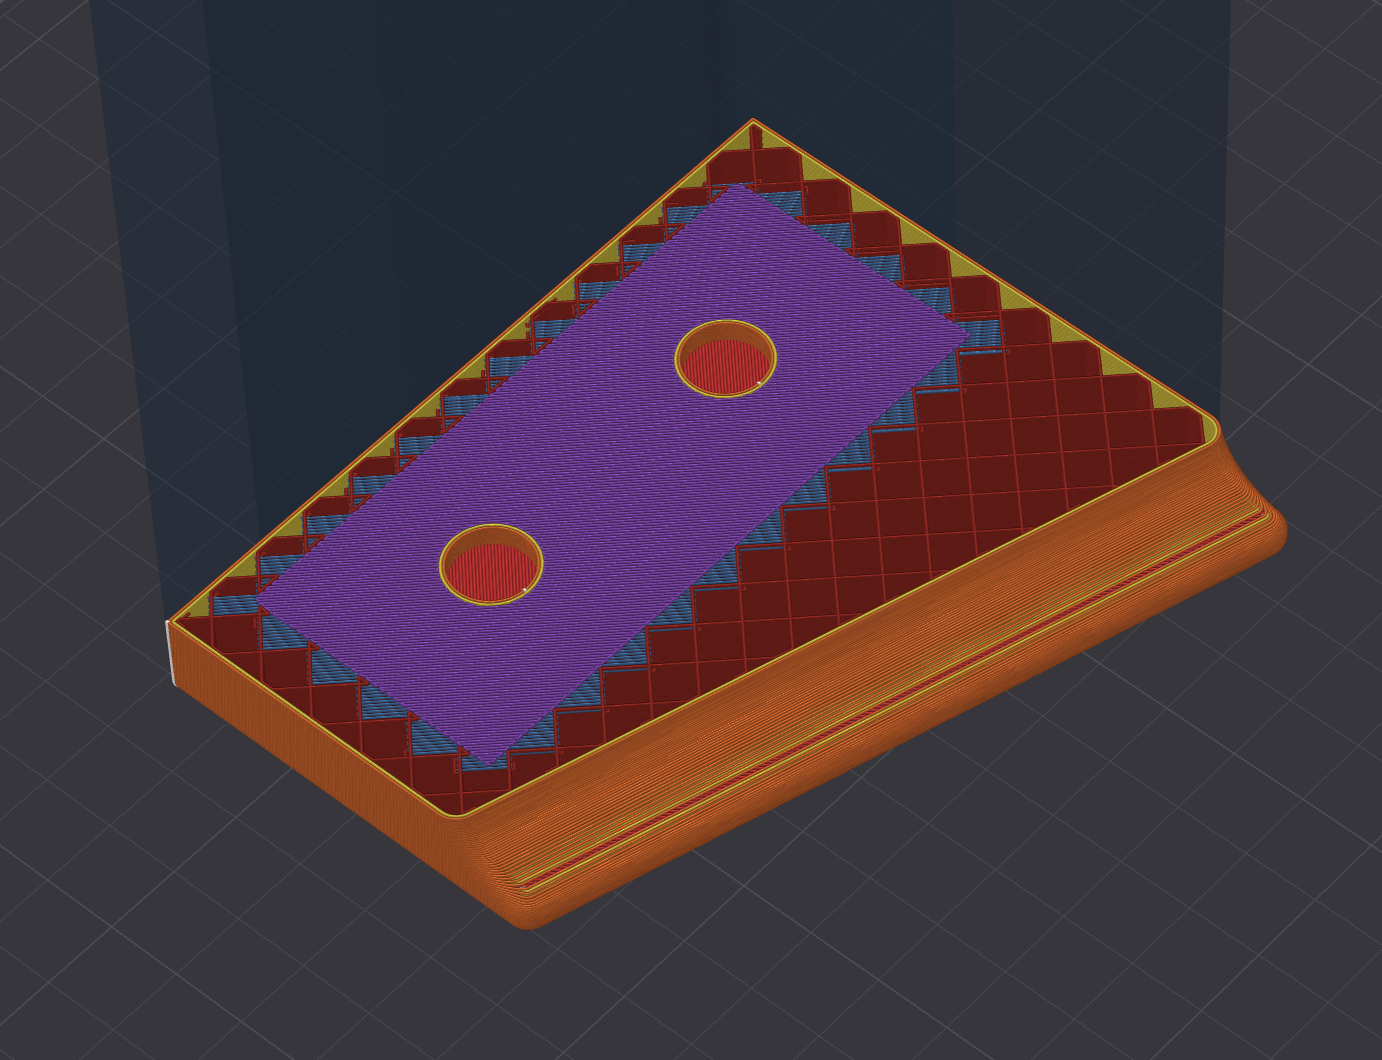
No Supports
In order to encase the magnets in plastic, the wedge had to be printed on its end which meant that the upper “ear” would be hanging out into open space. Supports are almost always needed in that scenario, because you can’t just print into empty space and expect the hot filament to not fall down. But, if you can offset each layer juuuust enough you can create an achievable arch or angle. Back in the cad software I increased the radius of the inner fillet (curve) where the ears meet the top of the wedge.
The drawer didn’t need any supports because the magnet holes on the end were large enough that the top arch of the circle could support itself as it was printed, and I’d chosen to leave the finger pull open at the top.
Because of the way a standard filament printer works, it just wasn’t possible to encase the drawer’s magnets in plastic and have no supports. I decided to leave them exposed.
Expansion & Glue Issues
You can’t print a 10mm void and expect a 10mm magnet to fit. The filament will squeeze inward as it cools and create a hole that’s slightly too small. With my printer I can pretty reliably assume just under 0.2mm of spread. When I add that much to the radius of the magnet hole, I get an almost perfect fit.
In the case of the drawer I designed it to be 0.8mm smaller than the hole it was fitting into, on all dimensions. This ended up being perfect.
In order to account for the gel-like Cyanoacrylate glue (Super Glue) that would hold the magnets in place I added 0.25mm to the depth of the magnet holes, and that worked out perfectly.
Encasing Magnets In Plastic
There are three complications with embedding magnets in a print
- You have to stop the printer mid-print, insert magnets without disturbing anything or getting glue anywhere it shouldn’t be, then resume the print.
- I use a hardened steel nozzle, which the strong rare-earth magnets really want to stick to as it passes above or nearby.
- The inserted magnets need to not interfere with the print head when it goes to lay down the next layer.
The first problem is pretty easy, but required a little prep. I added a pause in the slicer just after the layer that finished the walls of the magnet holes, set a timer for 33 minutes into the print so that I’d have a couple minutes to get ready, grabbed gloves, glue, paper towel, and a magnet insertion tool.
The tool is just a plastic wand with a magnet glued to the end of it, but it’s critically important because it guarantees that I have the magnets pointing in the correct direction, and it keeps my fingers away from the glue.
When the pause was about to happen I had gloves on, two magnets ready to be picked up with the tool, the flow pre-tested and ready to squeeze - sometimes the bottle gets clogged. When the printer paused, I picked up my tool, picked up a magnet, added a small amount of glue to the magnet, carefully inserted it, wiped away any excess glue, and repeated. Then I waited a full minute for the glue to set because CA glue cures by being exposed to air, and there is basically no air on it when it’s squeezed into the hole.
The problem with magnets not being able to interfere with the print head is the main reason I couldn’t encase the ones on the side of the drawer. Not without leaving a void around the top half of the disc which I wasn’t happy with.
Satisfaction
The end result is, in my opinion, beautiful.
That’s not what’s really satisfying for me though. The first glimpse of that feeling came when I slid in the drawer for a test fit before inserting its magnets. The fit is so perfect that the air pressure cushions it as it approaches the end of the insertion, and gives a hint of resistance as you pull. Not only that, but it stays in really well without the help of magnets.
It’s a satisfying feeling, the gentle friction as it slides, and the effects of the air pressure. It was also a reminder of how far I’ve come. With a combination of experience, and trusting my gut for aesthetics and some measurements, I was able to design something that does fits beautifully; both itself, and the tablet it was designed for. It printed beautifully. Encasing the magnets went perfectly. I love the way it feels as my finger slides into place, guided by the curve. I love the way it looks when I see my finger curled into that handle. I love the flush fit of the drawer, and the soft curves of the edges I hold on to.
Creating this simple object required a lot of experience to not only know what complications would be encountered, but to know how to address those issues. Even the simple curves of the edges are the result of years of experimentation to know what feels good, what looks good, and what constituted big enough, but not too big.
In the end, I’ve created something I’m really proud of, that has helped me see just how much I’ve learned on my journey to be a better Maker.
Want One?
I’m considering selling physical versions of this, and the models with assembly instructions, and a bill of goods for the felt bottom and magnets, for people who have 3D printers. If you’re interested drop me a line on the Fediverse (Mastodon) at @masukomi@connectified.com or via email at masukomi@masukomi.org. I’m not very good with email though. Physical ones would probably be $40 or more. The raw materials to print and ship cost ~$11 USD and that doesn’t include time spent cutting the felt foot to shape, attaching it, or having to be sitting beside my printer at the precise time it will pause so that I can insert the magnets. 😉
Postscript
You may have noticed that the new wedge is entirely Marine Blue except for the side with the drawer. I ran out of Marine Blue filament 96% into the print. I swapped it for something else while half asleep at ~4 AM when the dog asked to go pee. The color was lighter than I realized in the dim light, but it was already starting to work its way through the system when I realized this, and I was too tired to deal.
It works great in photos for showing a clear distinction between drawer and side though. So, another lesson learned for future product shoots.