Fnatr 02 Box Fan Replacement
How to replace a broken fan on the Fnatr #02 Box
Overview
It’s essentially impossible for human hands to insert the plug from a new fan into the circuit board. There is a very tempting screw that looks like it’s holding the circuit board on. You’d think you could just undo that and have easy access. Removing that screw does nothing. Don’t bother. Instead, you’re going to need to carve out a space large enough for human fingers to fit in there and align the tiny plug into the tiny socket.
While you’re off buying a new fan, you might want to consider grabbing some magnets and printing my replacement HEPA filter holder. I have no idea what filters the Fnatr expects, but my replacement allows you to use cheap, easy-to-find, 3rd party ones.
Before you start, gather the following
-
A replacement fan.
You’ll need a 80mm x 80mm 5v DC fan with a 2 pin connection. If you want to reuse the screws that came with it you’ll need that fan to be ≤ 10.5mm thick.
This fan on Amazon US is an appropriate replacement. It comes with 2 fans and some metal grills that you can’t use.
-
A 2.5mm Allen Wrench
-
Tape
Painters tape, Scotch tape, Masking tape, whatever.
-
A Dremel
Alternately a router with a small bit, but that would require disassembling the enclosure and you probably don’t want that.
-
A wood carving bit.
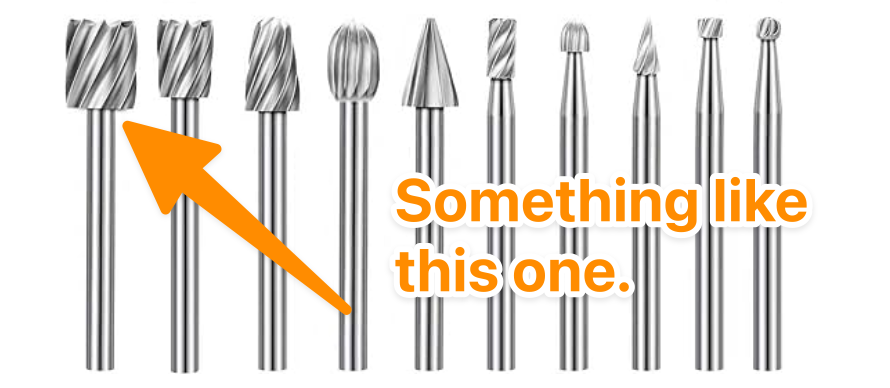
-
Something to provide upward facing lighting
You’re going to be carving into the ceiling.
If you’re wondering that shiny stuff is the aluminum layer on the inside of the Butyl Rubber soundproofing. It’s designed for cars, and works great there. It works well here too. From the outside my enclosure is entirely black because the other side - the rubber side - is very black.
-
Eye protection
Carving upside down means little flakes might fall into your eyes.
-
Respirator
I don’t know what the roof and floor of the enclosure are made of, but it releases some pretty obvious VOCs when you start carving into it. It’s not terrible, but it’s not great either.
The process
This assumes you’re going to do the work in-place. This will be easier if you remove the enclosure lid, flip it over, and put it on a work surface. However, that means reassembling the thing, which is a pain-in-the-butt unless you feel like also routing a chamfer into the outer edge of the groove before you re-assemble it. That would be a nice improvement, but as this carving will take you less than 5 minutes, and you’ll probably never disassemble it again. It’s probably not worth it.
-
Remove whatever’s in the enclosure (presumably a printer) to give yourself space to work.
-
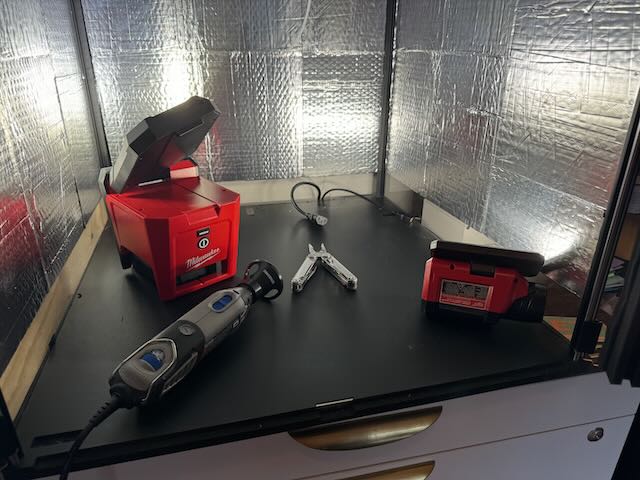
Set up lighting.
-
Unplug the enclosure The USB-C plug.
-
Unplug, the existing fan and light. You’ll probably need to use needle-nose pliers.
-
Unscrew the fan.
-
Move the light wires out of the way. I recommend taping them out of the way. Removing the light bar would be better, but I think it’s glued in.
-
Place tape over the plugs and sockets so shavings don’t get in them.
-
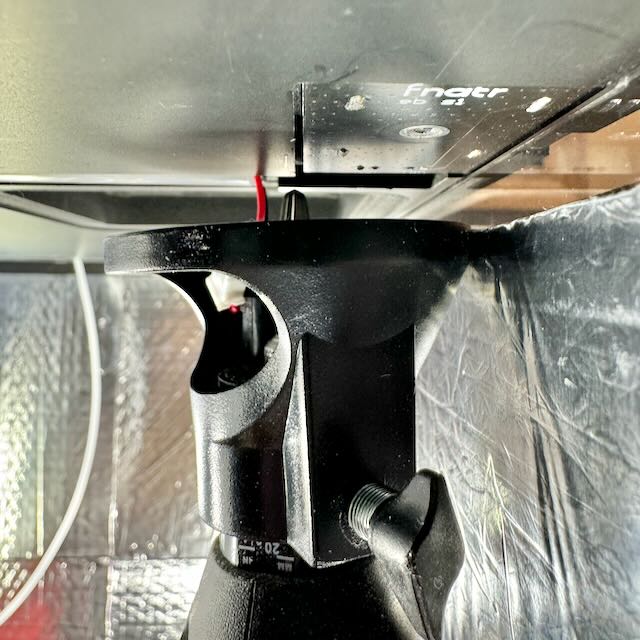
Start carving with the Dremel
Note, you CAN NOT use the depth shroud thing. As you can see in the next image, it won’t allow you to get close enough to the edge. You’re going to have to freehand this.
This is what mine looks like now that I’m done. The only applicable bit i had was a cone with a rounded end. That’s why the top of my carving looks all wibbly. Also, you can see just how fine the particles are and why it’s important to tape off your connectors. I used canned air to clean everything out.
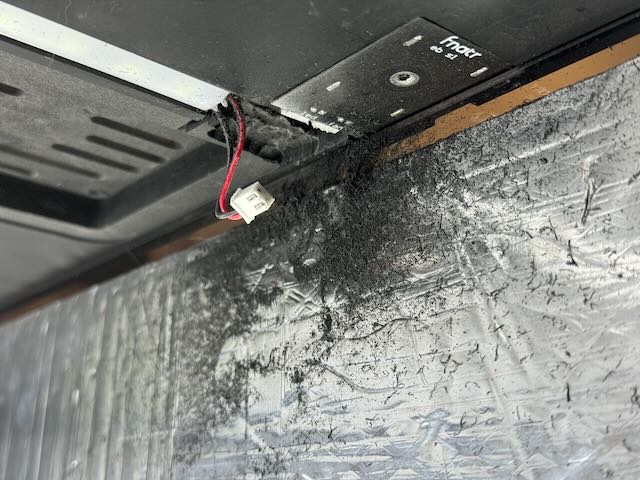
Note that you can make the hole bigger. I think the size in that photo is about the least you can do and actually be able to plug things in. It doesn’t matter if the edges of the hole make a seal against the side of the fan. The cutout for the fan is really only used to orient it under the screw holes.
-
Vacuum everything.
-
Pull the old fan off of the metal plate.
It’s not attached. It’s just sitting on little posts.
-
Replace it with the new fan.
-
Plug the fan and light back in.
-
Plug the USB-C back into the outside.
-
Test that the fan is blowing in the correct direction.
-
Screw it into the enclosure.
Be sure that the cord is exiting the fan towards the doors of your enclosure.
-
Optionally install replacement filter holder
If you printed my replacement filter holder, and have the appropriate filters, now’s the time to install it.
-
Stick your printer back in the enclosure.
-
Run a test print to make sure nothing got jostled while moving the printer.
-
Congratulate yourself on a job well done. :D